Tutorial: Baggy Dude Shirt Convert Time!
This is a repost of one of my old blogs.
(Originally posted on Blogger: 24th October, 2014)
Hello my lovelies!
I have found that a lot of the shirts I like are only available in guy sizes.
In the past when I came across this problem, I would either decide I didn't need it or I would get the size small and probably only end up wearing it around the house because of the whole dudes not being lady shaped and me looking like a dag thing.
HOWEVER! I finally gutsed up a while ago and put the scissors to one of these shirts so I could try and make it fit me better. It turned out to be somewhat of a success and it has since become a little bit of an addiction. I have only completed 3 so far, but I plan to make many more because it is fun and I get cool clothes out of it!
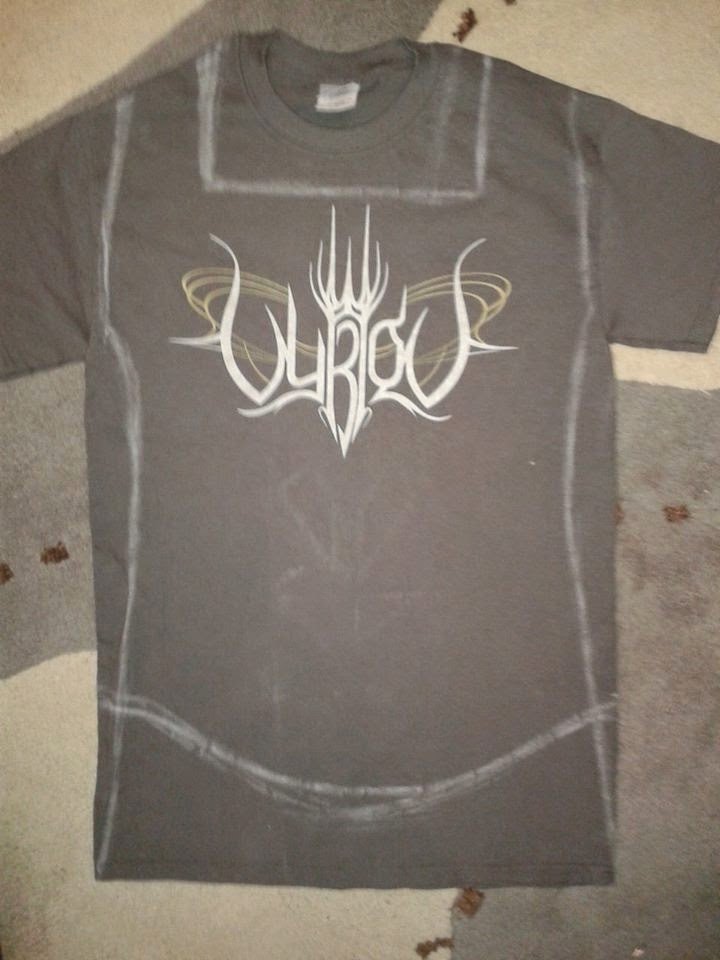
In this here blog post, I am going to show you how I turn my big baggy t-shirts like this one...
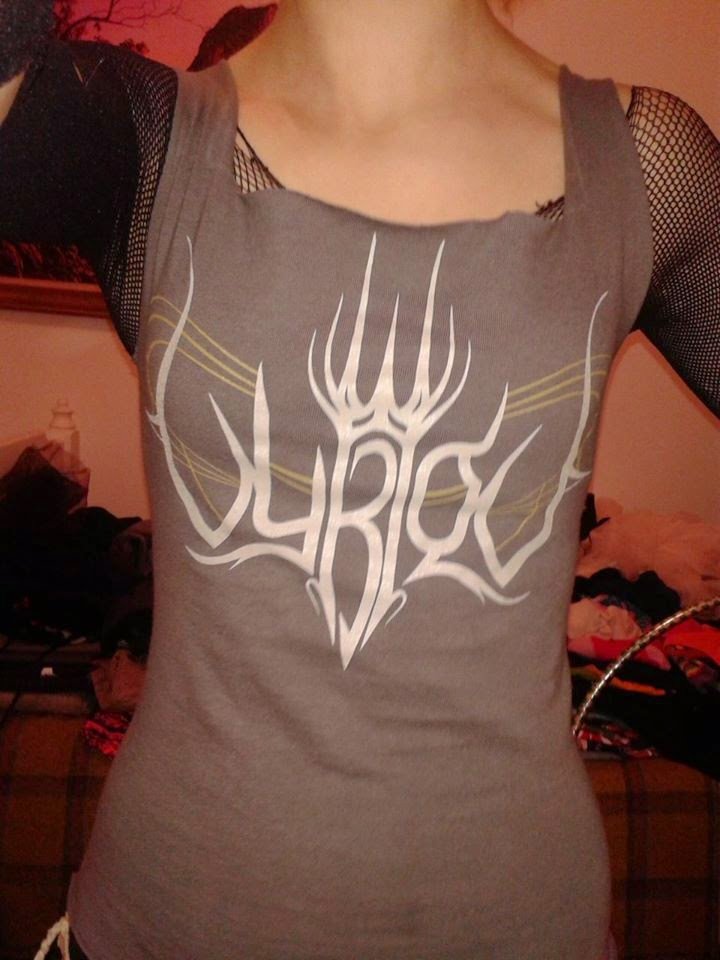
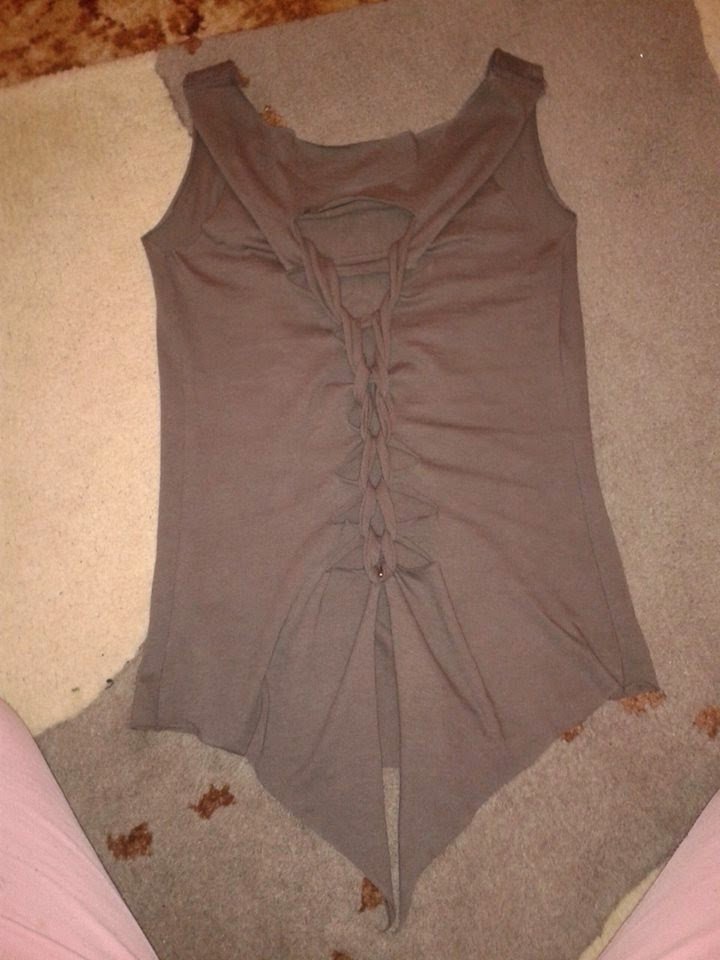
Into something like this:
Before I tell you how to do this, I want you to be aware that a lot of my process involves just winging it and the photos I will be showing you were only taken for my own future reference because I didn't know I was going to be making this tutorial. I will do my best to explain everything and hopefully these photos will be sufficient. If you have any questions or confusions about any of this, feel free to ask in the comments and I will try to help :)
Things you will need:
A shirt that you are willing to cut up (remember that accidents can happen)
Sharp scissors
Pins for holding stuff together
Chalk or a fabric pencil for drawing on stuff
A sewing machine (or needle and thread and lots of spare time...)
A shirt that already fits you nicely (optional)
And a mirror somewhere that you can see your torso in
Now, technically you should make sure your shirt has been washed before you start this so you know it isn't going to shrink or change shape or anything.
You don't have to, but I would recommend it.
Done that?
Cool.
Let's do it!
1. Put your shirt on and have a look in the mirror so you can check if there are any defects or anything that you need to take into account before you start your shirt convert. One of my shirts had a little bump on one side of the neck where it had caught a bit of extra fabric during manufacturing, which meant the print sat ever so slightly at an angle when it was on, so I had to make sure I got it straight when I was working out where to cut.
While you still have the shirt on, use your chalk to mark out how long you want it to be (front, back and sides), where you want your neckline to fall, where the arm holes/sleeves should start, and anything else you might need for your particular design.
If you want to really custom fit your shirt, you can pin where you want the seams to be now. Just make sure you don't do it too tight, you still need to be able to get it on and off. If you prefer, you can get your side lines using a shirt that already fits during the next step.
2. Now you get to play around and work out the main part of your design :D
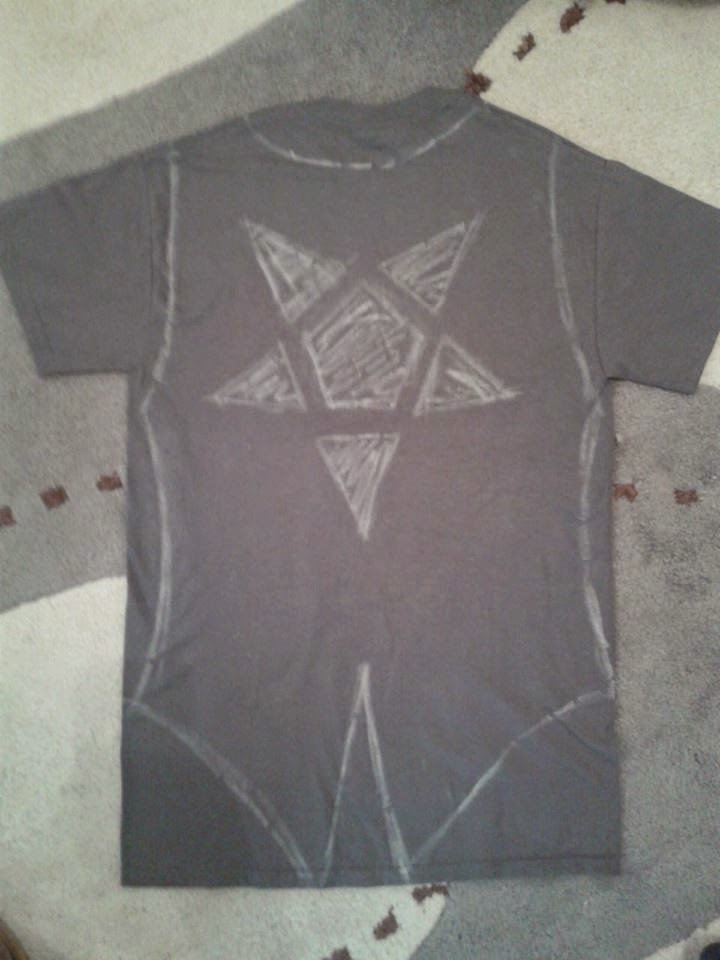
Lay your shirt down flat and flesh out the marks you made for the bottom, neck, and arms. If you didn't pin your sides earlier, grab a shirt that fits you nicely and lay it neatly over your baggy shirt, making sure you get the necks and bottoms parallel so you don't end up with a rhombus shaped top. Trace the shape of the sides onto your baggy shirt with your chalk. If you did pin your sides earlier, draw your lines along your pins. Don't forget to mark the back as well.
Now sketch out anything else you might want to add. I have a bit of a thing for square necklines and butt tails, but this part is entirely up to you, so go nuts. I decided I didn't like that star on the back as soon as I finished drawing it, but I was going to have it as a cut out. I haven't played around with them yet, but when I do I will be sure to share my adventures. You could use any simple stencil design for cut outs on any part of your shirt, maybe even add a layer of nice lace fabric or something underneath it later if you are feeling fancy.
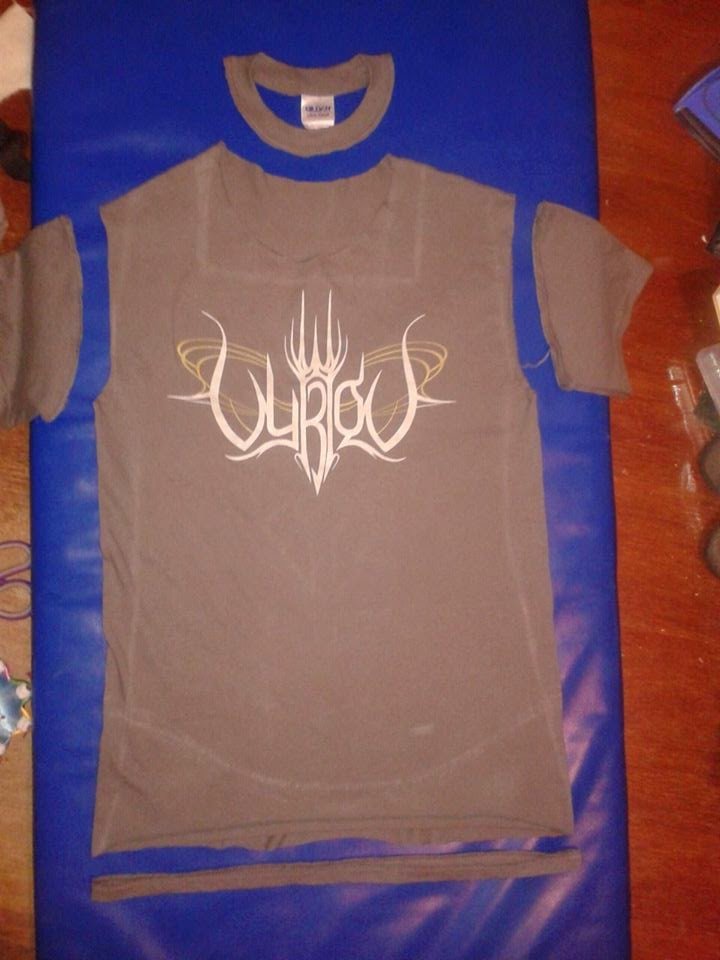
3. Once you have your design worked out, it's time to start deconstructing your t-shirt. Because we are going to have some raw looking edges from cutting, you will probably want to make all the rest of the edges raw too, unless your shirt is made from fabric that frays. If this is the case, you will need to finish any of the new edges you are creating to keep your shirt from falling apart, but I’m not the person to help with that because I’m not amazing at sewing. Most regular t-shirts won’t fray when cut, and it looks a little bit silly when half of the edges are raw and half of them are professionally finished, so go ahead and start cutting. You will want to take off the collar, the sleeves, the hem of the sleeves, and the hem on the bottom of the shirt, as pictured below.
After you have done that, you can stretch out the raw edges to make them look a bit nicer. They will stretch with wear and washing anyway, so it is best to do it now while you are still making it. You probably don't want to cut a big deep neckline only to have it stretch and become an underbust.
If your sides aren't pinned yet, do that, and then try your shirt on again in front of the mirror because we are going to start fitting it soon and you need to make sure everything you just drew is going to be in the right place. Fix anything up if you need to.
Once you are happy with how everything looks, take it off and take a big deep breath because we are about to get to the scary part.
4. Are you ready? It's time to cut out your necklines, armholes and bottoms. You might want to do a bit at a time so you don't accidentally cut too much. I like to cut about an inch away from my lines to start with, stretch them out, and then try it on again so I can see if something is about to go terribly wrong. You might not always need to cut all the way to the line because of the stretching, but mine have all ended up pretty much bang on so how you go about this depends on how brave you are. Good luck.
Okay, you've cut your shape, got your sides pinned, tried it on again, and hopefully are on your way to a fabulous new top. If you are happy with how things are going, we shall continue. If you aren't happy with what you have just done, don't get too disappointed. You can always make adjustments and change up the style if there’s still enough shirt left, otherwise you can just cut out the picture to use as a sweet patch and use the left over fabric for something else. That's why we didn't pick your favourite shirt.
5. If you've got your sides pinned so that the excess fabric is on the inside of the shirt, you are good to go. If you have the excess on the outside, you will need to turn your shirt inside out and move it around until you have a nice neat line down the side as close to the pins as you can get. Chalk this line, repeat on the other side, and then remove the pins and re-pin it while it is inside out.
Try to get your armholes and bottom cuts even where they meet up at the sides. I like to make sure my armpit is lined up nicely first because the bottom is easier to even out if I need to. Once everything is all in place, go ahead and sew those side seams. Trim off most of the excess, turn it back so the outside is on the outside again, check your fit and make sure you didn't screw up. I recommend not cutting the excess too close to the seam until you know it fits in case you need to undo it and try again.
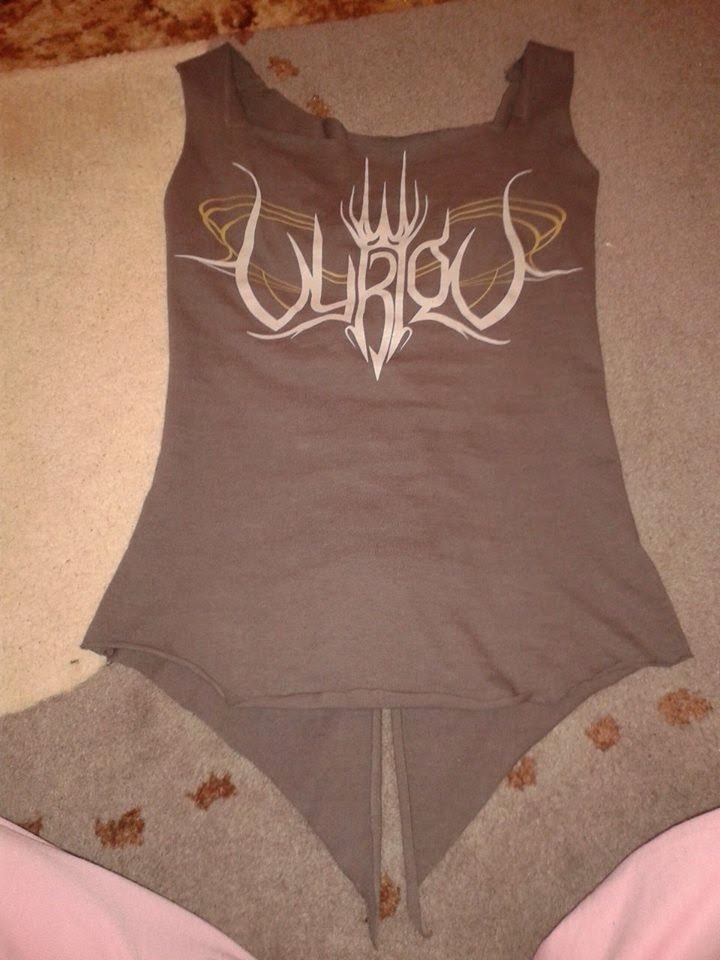
If my instructions have been comprehensible, you will hopefully have something along the lines of this:
Except, like... your design.
If you like, you can leave it like this, but I'm going to keep going.
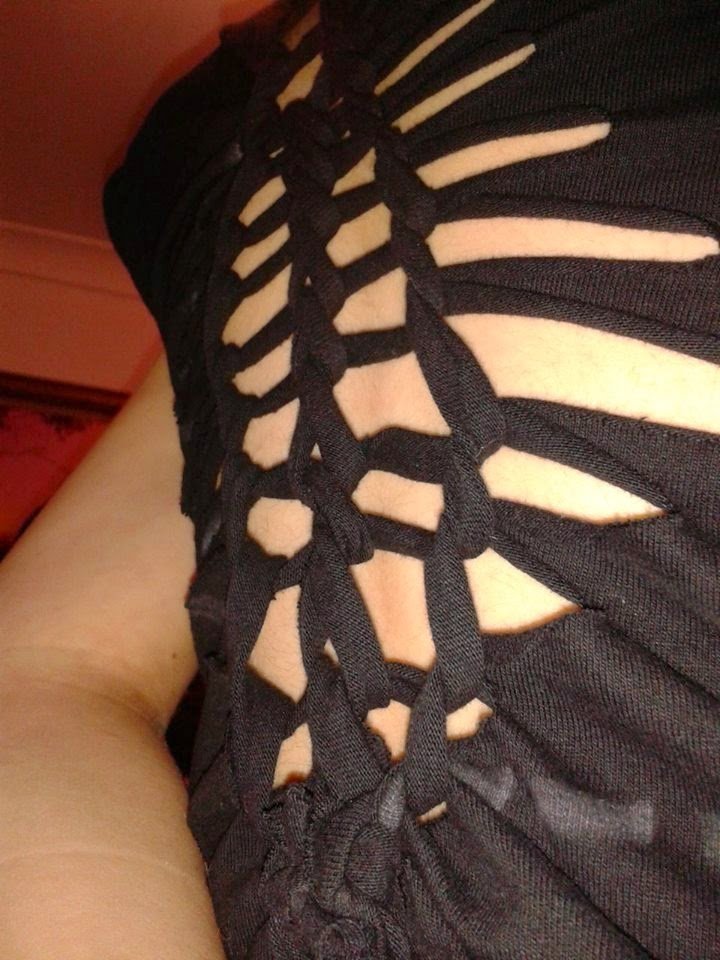
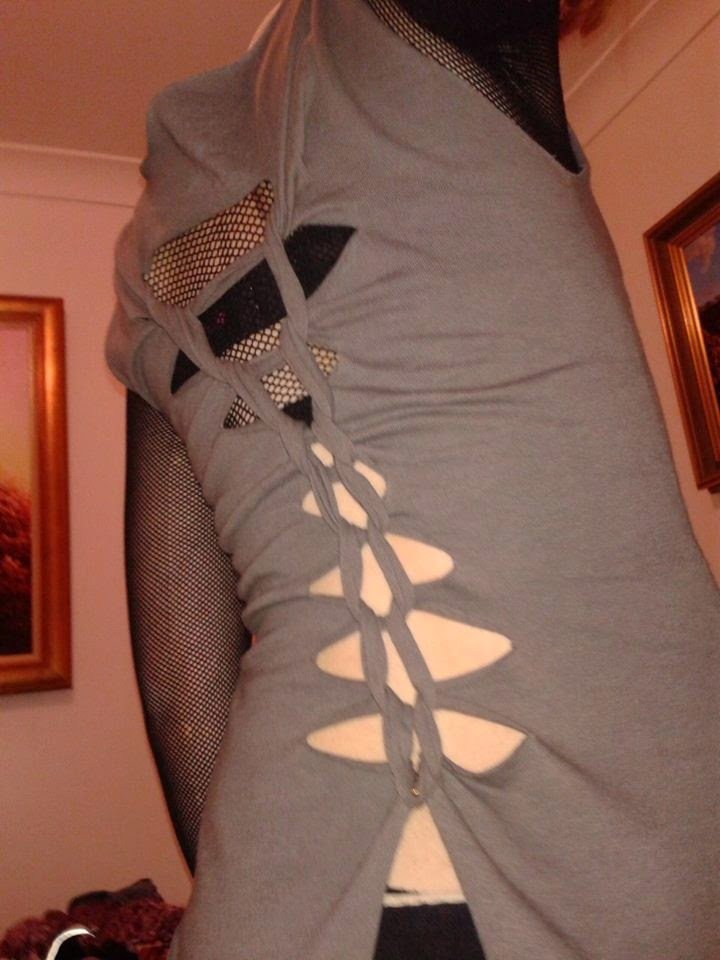
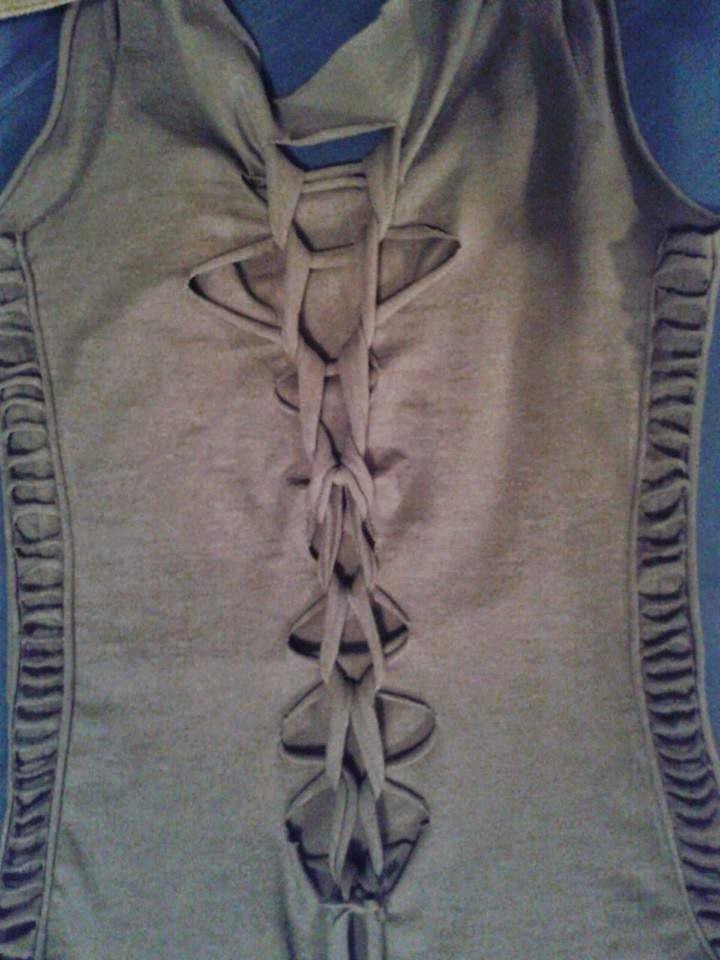
The next thing I do is ladder/weave. You can have a lot of fun playing around with these by using different shapes and weaves and putting them in different areas. I usually put a big one down the back, but they look good pretty much anywhere.
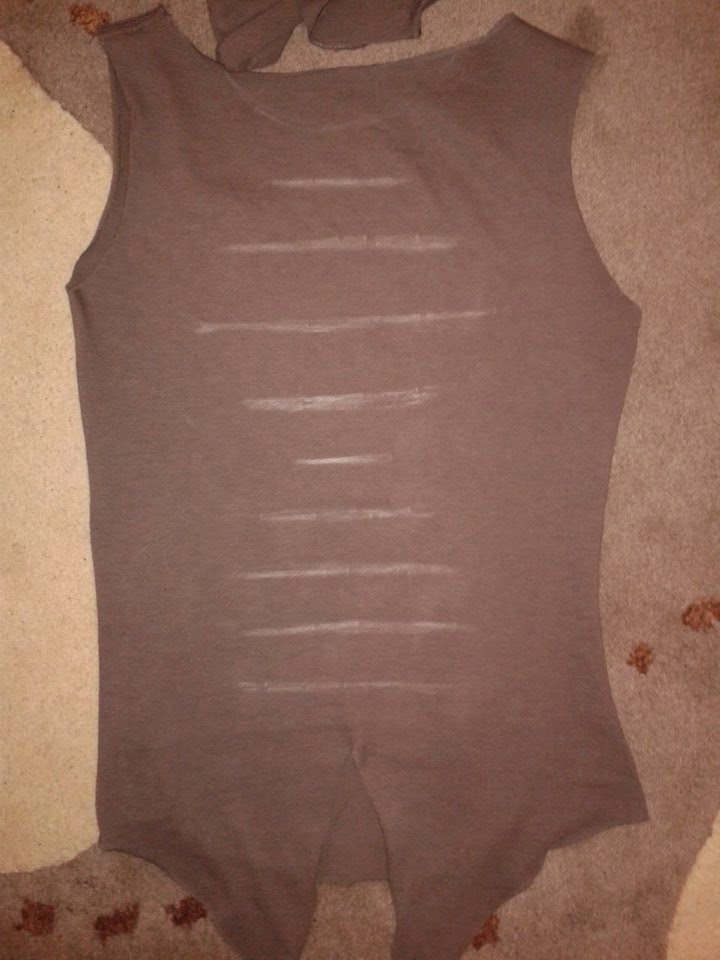
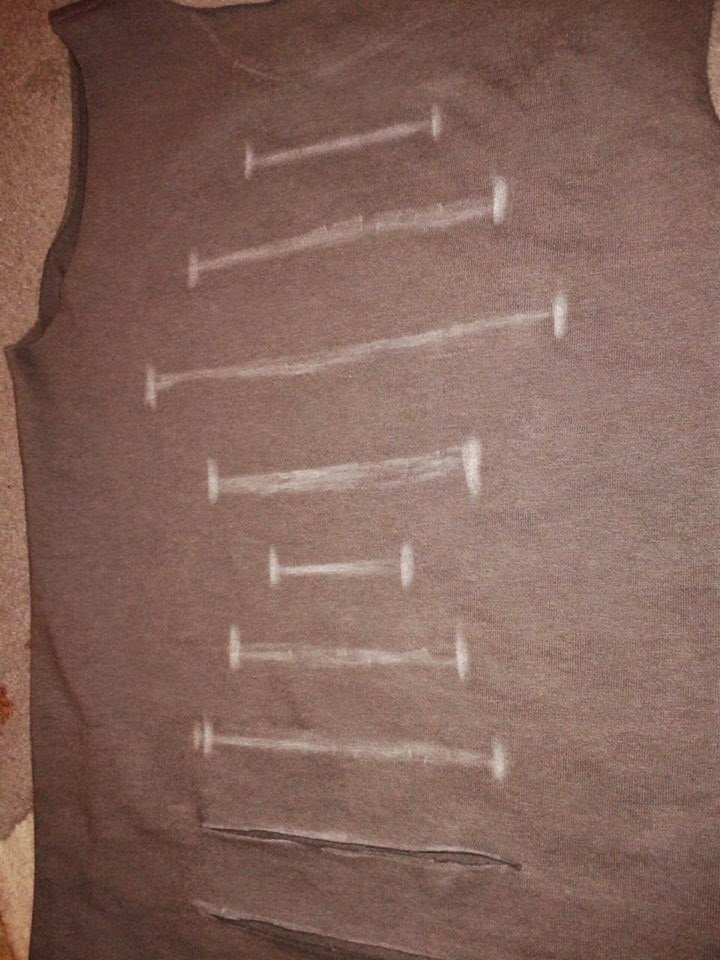
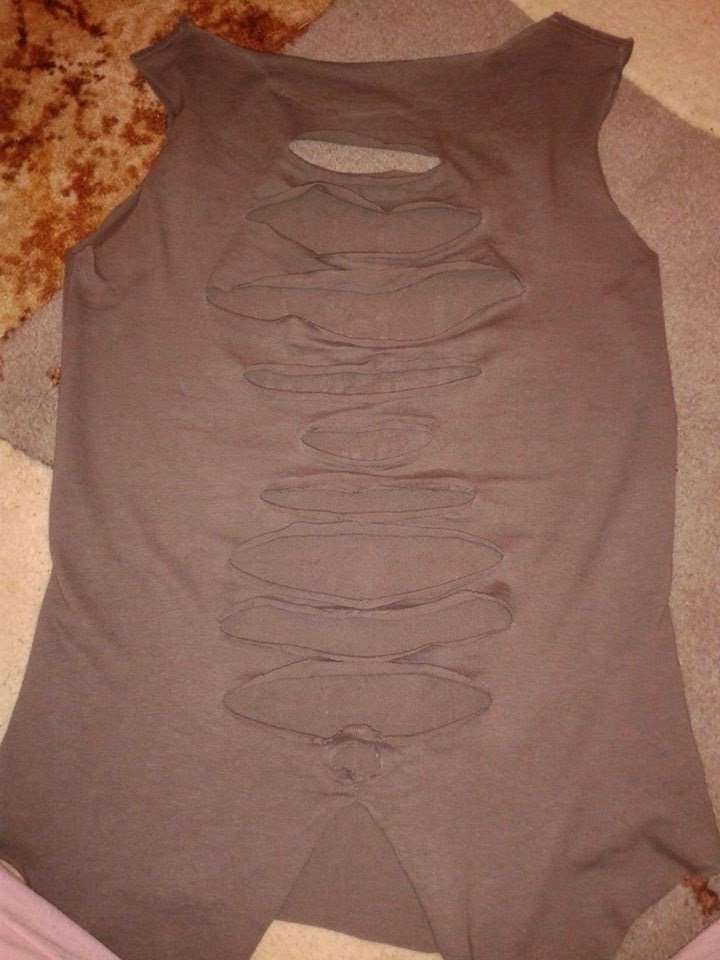
6. Figure out what shape you want and then draw a bunch of evenly spaced horizontal lines in that shape. I did a sort of hourglass shape for this shirt and a diamond shape for the black one. I just drew these by eye, but you might want to use a ruler or something if you aren't very good at drawing straight lines.
When you have your shape drawn up, go ahead and cut along the lines making sure you don't accidentally cut the other layer of fabric underneath. I added little vertical lines on the ends of mine so it was easier to tell where to stop cutting.
After you have cut them, stretch them out and start weaving. I'm not even going to try and explain how to do this in text, so I have added a video just below that will teach you how to do two different weave styles.
If you're not sure how to finish off the end of your weave, do this:
(skip to 5:02 for quick tie off instructions)
You should now have something that looks like this:
Yay!
I finished off my Vyrion shirt by adding some cool detailing over the side seams.
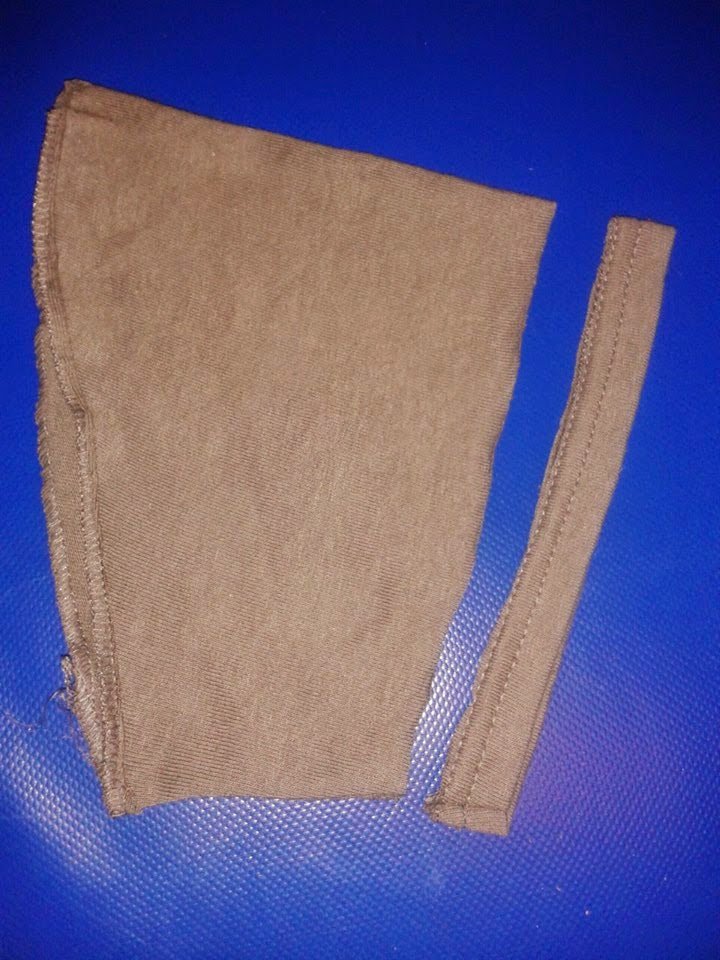
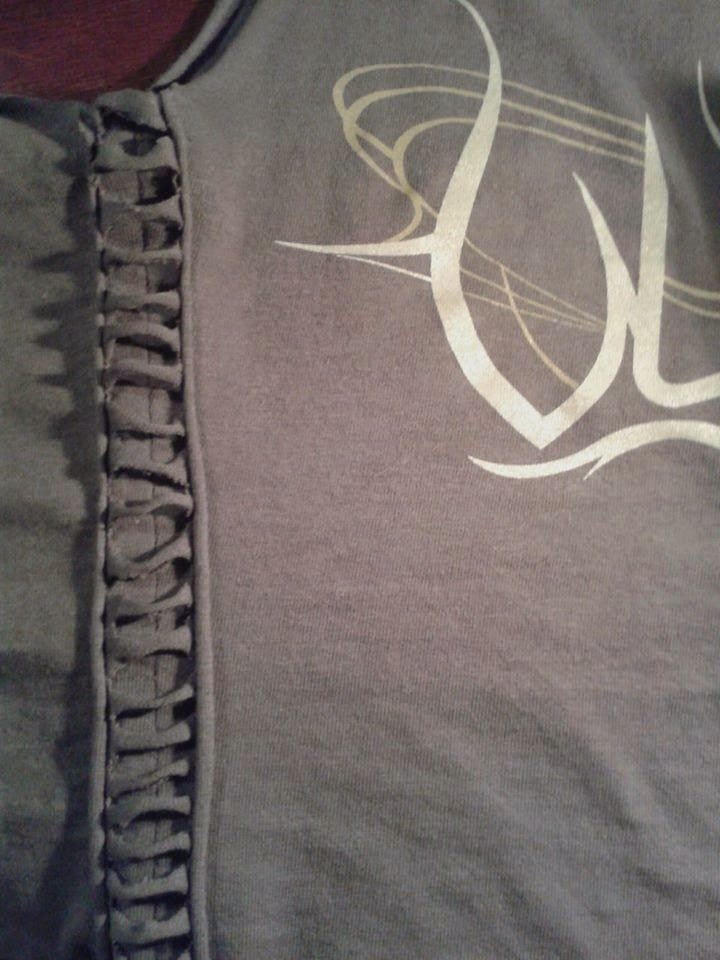
To do this, I took the excess fabric I had cut off my shirt and cut two strips of equal size, long enough to cover the whole seam. I then folded those strips in half lengthways and cut little snips the whole way down the folded side, being careful not to cut all the way through, and stretched them out so I ended up with two pieces like this:
I pinned them over the top of the side seams and sewed down both sides of the piece so it ended up like a little tube. The sides automatically rolled themselves over to hide the stitching because of the stretching.
Want to add some sleeves?
Relocate the ones you cut off earlier and I will attempt to explain how I went about doing mine.
Now, I am sure there is a fancier way to do this, but I put my shirt on, stood in front of the mirror, and tucked my piece of sleeve fabric into the armhole, moving it around until it sat nicely. I then used the chalk to mark onto the sleeve fabric where the armhole ran across it, where I wanted the sleeve to end, and for my particular sleeve design I drew where I wanted my cut outs and slits to be. You might want to pin it while you are doing this so it doesn't slip around and mess up your marking.
Then I took the sleeve back out (leaving the rest of the shirt on) and put it on my desk so I could draw the shape up properly, making sure I left extra space for seam allowance and adjustments where the sleeve would attach to the shirt.
I cut it out, stretched all the raw edges and tucked it back into the armhole quickly to make sure it looked right before tracing the shape onto the other piece of sleeve material for the other arm.
Cut and stretch your second sleeve, pin them both into place and sew them on.
Now you have sleeves :D
If there is anything else you want to add to your shirt, now is the perfect time to go crazy on it with finishing touches.
Get any remaining chalk off by either washing it or beating the crap out of it on some carpet or something.
You might want to gently hand wash your shirt if you are worried about it getting ruined in the washing machine. I washed mine by hand the first time but then I got lazy. My cut up shirts have been through the washing machine lots of times and I haven't had any problems yet, but I like to live dangerously.
Now go and show off your new sexy awesome shirt!
Be sure to show me a photo of your finished shirt convert if you do one.
I want to see it with my eyeballs!
#shirtconvert
Peace out xx


